Can a plumber install a sink? That question seems silly, and yet, it pops up a lot all over the internet in FAQ sections. The answer is yes, as long as the plumbers you are referring to are licensed, insured, certified contractors, not amateur plumbers who watched a little HGTV, went to a home improvement store a couple of times and now fancy themselves an expert.
It’s difficult to think of anyone who would be better qualified than a licensed, experienced plumbing expert to install a new sink. So, the question of whether a plumber can install a sink has left us scratching our heads, because of course he or she can.
Sink installation is no easy task. What follows is a very basic, general overview of the process, the purpose of which is to illustrate how many steps are involved in removing and replacing a sink, and why it’s a job to be undertaken by an expert.
Getting Ready for the Project
 First, the plumber will gather all the necessary supplies, the majority of which he or she will already have in his or her possession. This includes basic plumbing tools like gloves, eye protection, a utility knife, putty, a putty knife, a hacksaw, rags, buckets, a tape measure, so on and so forth. Among the necessary supplies?
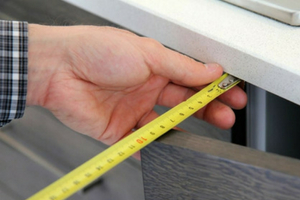
The new sink, of course, but that comes a little later after all of the measurements have been taken and the relevant building codes and regulations have been checked. Extensive measurements will be taken of your existing sink, as well as the space your kitchen allows in the event you are doing some remodeling.
The way your current sink is set up will be documented in detailed notes and, in almost all cases, with digital photos so that the plumber can verify that the new sink has been installed correctly. Before going any further, the water must be shut off, as well as the power to the dishwasher and garbage disposal lines. The faucets should be turned on to release the built-up pressure and remaining water.
Removing the Old Sink
 Once the water has been shut off, all of the faucets need to be turned on to release any water trapped in the plumbing and to reduce the pressure within the pipes. At this point, the plumber begins to disconnect every pipe, valve, and hose.
This is usually somewhat messy work, which is why plumbers wear gloves, have buckets to catch anything that might fall out of a cut pipe and have plenty of rags available for cleaning up on the go.
Next, the metal brackets that hold the outside of the sink in place must be removed using tools. The brackets act like clamps. The perimeter of the sink will also be held in place by a sealant, putty or caulk, which is scraped away using a putty knife or similar tool.
At this time, the old sink can safely be lifted out of place from underneath. Before the new sink is installed, the work area should be completely cleaned. Any remnants of putty or otherwise should be scraped away and wiped down.
Getting The New Sink Installed
 The installation of the new sink is essentially the process of removing the old sink in reverse. The plumber will refer back to his or her notes and images of your previous plumbing configuration to ensure that everything has been reconnected and hooked up correctly.
Some adjustments are needed in order to get everything to fit properly, despite the plumber taking careful measurements beforehand. For example, a pipe may be slightly too long to connect perfectly, so a hacksaw is typically used to remove the excess length.
New metal brackets are applied and secured with caulking and sealant. After the sealant is adequately dry, the plumber will turn the water back on, followed by the electrical power to the dishwasher line and disposal. Several tests for leaks will be performed to make sure that your new sink is working perfectly. Any repairs, tweaks or adjustments will be made until everything is operating as it should be.
The steps outlined above should provide you with a general, basic overview of how old sinks are replaced and new ones are installed. Remember, sink installation is a job for a licensed professional contractor. If you get the urge to attempt a DIY project, try something that is less likely to go catastrophically wrong and will not result in you accidentally flooding your kitchen.
The next time someone asks whether a plumber can install a sink, feel free to give them the side-eye, because there is no one more qualified than a plumbing expert to accomplish exactly that. To reach a plumbing expert (who indeed can install your new sink), call our friendly team at Daniel Cordova Plumbing, Drain & Sewer.


 It’s crucial you don’t screw up the measurements when cutting into a
  While
While  It’s critical to get in touch with a professional to help with cutting a stone countertop and installing a sink. These professionals will have access to special tools needed to cut stone, which may not be available for rent to homeowners.

 Garbage disposals also help with
  It’s common for food particles to make their way down our drains. This can become a problem, however, if too many large pieces get stuck and clog up the works.
 Some refrigerators will let put a glass or pitcher in a specific receptacle and get clean, cool drinking water, just like from a faucet.
 Some refrigerators may also be able to take water, and create ice cubes with them. That means you don’t need an ice cube tray, water and some time in the freezer to enjoy chilled drinks.
 For people living in West Covina, CA that don’t feel like taking the DIY approach, another viable solution is to call the professionals!